

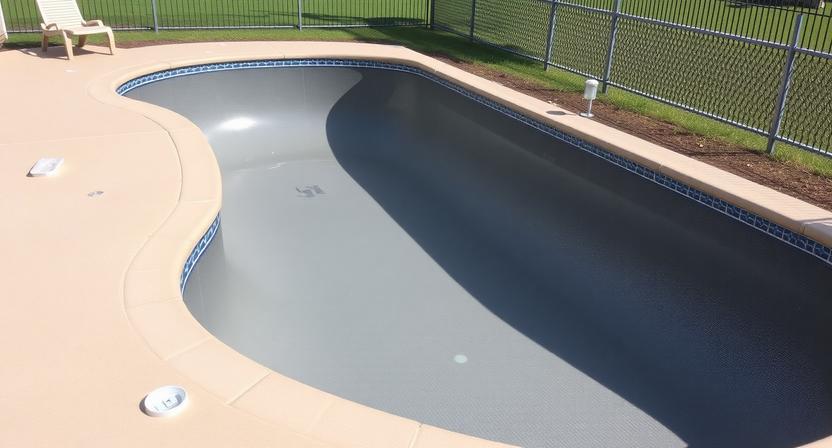
A vinyl liner replacement is the most routine major maintenance event in a vinyl pool’s life — expected roughly every 7–12 years and, for an experienced crew, completed in 1–3 days. Getting the timing right (not too early, not so late that the liner is leaking significantly) and understanding what the process reveals about the pool’s underlying condition are what this guide covers.
Repair vs. Replace: The Decision Framework
Not every liner problem requires replacement. The decision depends on the liner’s age, the nature and extent of the problem, and whether the liner’s overall condition justifies a repair investment.
Patch, don’t replace, when:
- The liner has a single puncture or small tear and is under 7–8 years old
- The liner is otherwise in sound condition — good colour, good flexibility, no widespread cracking
- The damage is in a patchable location (not at a fitting, not at the bead track)
Replace, don’t patch, when:
- The liner is over 10–12 years old — a patch on an aging liner frequently precedes the next failure by a short time
- Multiple tears, holes, or leaks are present
- The liner is visibly brittle — cracking when touched or in the waterline band
- Widespread floor wrinkling that won’t smooth out (the liner has lost its elasticity)
- The liner has pulled out of the bead track and can’t be re-seated
The economics: a patch kit costs $30–$80 and preserves a liner that still has years left. Patching a liner that’s 12 years old, heavily faded, and showing brittleness is a short-term fix — the next problem will arrive within a season or two.
Signs a Liner Needs Replacing
Brittleness and Waterline Cracking
The waterline band is where a liner takes the most UV exposure and the most contact with sunscreen, body oils, and chemical fluctuation. A liner that shows cracking, flaking, or loss of flexibility specifically at the waterline band has been chemically and UV-degraded — the material itself is compromised, not just the surface appearance.
Widespread Fading
Significant overall colour loss indicates the vinyl’s plasticizers have migrated out over time — the same process that makes old vinyl brittle. Heavy fading often coincides with reduced flexibility and a liner approaching the end of its structural life.
Persistent Wrinkling
New liners sometimes develop small wrinkles early on. A liner that develops extensive wrinkling in the floor after several years, particularly when it didn’t wrinkle initially, is showing that the vinyl has relaxed and can no longer hold the shape it was installed in. Significant wrinkling that doesn’t reduce when the pool is filled is a sign of a liner that needs to go.
Slipping Out of the Bead Track
The liner’s upper edge is held in a receiver track at the top of the pool wall. A liner that repeatedly slips out of the track despite attempts to reseat it has shrunk or become rigid enough that it no longer has the elasticity to stay in place.
Active Water Loss
A liner that’s losing water despite patching, or that’s losing water and no obvious source can be identified, may have multiple small failures too numerous to patch individually. If significant water loss has been ongoing, the floor base and wall panels may also have been affected by the water movement.
Liner Replacement Costs in Toronto
| Scenario | Typical Cost |
| Standard size (12’x24′ – 14’x28′), solid colour, 20 mil | $4,000 – $6,500 |
| Larger pool or premium 27–30 mil liner | $6,500 – $8,500 |
| Custom shape, patterned liner, or built-in features | $8,000 – $10,000+ |
Costs cover liner fabrication, old liner disposal, installation labour, and vacuum equipment. Water to refill the pool (Toronto water rates run approximately $3.25 per cubic metre for combined water and sewer) adds $200–$400 for a typical residential pool. Chemistry start-up adds another $100–$300 in chemicals.
The Liner Replacement Process
Draining the Pool
The pool is drained completely — liner replacement is one of the few occasions when a vinyl pool can and must be fully drained. Equipment is typically turned off and the drain plug or a submersible pump is used for draining. This takes 12–24 hours for most pools.
Removing the Old Liner
The liner is cut, pulled from the bead track, and removed in sections. This is straightforward for experienced crews but involves significant physical material — an old liner from a 16’x32′ pool weighs roughly 50–80 kg when dried.
Wall and Floor Inspection: The Most Important Step
This is what distinguishes a liner replacement from a new installation — the contractor can now see the pool’s interior structure directly for the first time since it was built (or last re-linered).
What to look for on the wall panels:
- Rust on steel panels: common on older installations, particularly where water has infiltrated behind the liner. Light surface rust is normal; significant corrosion that has weakened or perforated a panel means that panel section needs to be repaired or replaced before re-lining. Installing a new liner over a compromised panel creates an uneven, bumpy surface and a structural risk.
- Panel movement or gaps: panels that have shifted, buckled, or separated indicate ground movement or inadequate original bracing
- Top rail condition: the top rail provides structural rigidity; a corroded or bent rail affects liner fit
What to look for on the floor base:
- Base settlement: the sand or vermiculite floor base can compact or wash out over years, particularly if the pool has had water loss. Uneven floor base produces an uneven, wrinkled liner surface after installation — any significant floor irregularity must be corrected before the new liner goes in
- Sharp objects or protrusions: anything that could puncture the new liner immediately after installation; this includes debris that settled into the base, corroded staples from the original installation, or small stones
A thorough contractor will document what they find and discuss any repairs needed before proceeding. Skipping the inspection and installing a new liner over damaged panels or a compromised floor base is a shortcut that results in premature liner failure.
Floor and Wall Repairs (If Needed)
- Sand or vermiculite base is regraded and smoothed where it has settled
- Panel sections that are significantly corroded may be reinforced or replaced
- Cove material at the floor-wall junction is checked and reformed where it’s deteriorated
New Liner Measurement, Fabrication, and Installation
The pool is measured — fresh measurements from the actual pool, not original specifications — and the liner is ordered. Fabrication takes 1–3 weeks. Installation follows the same vacuum-fitting process as a new liner: liner is unfolded into the pool, bead is seated in the track, a vacuum is applied behind the liner to draw it snugly into all corners, and filling begins simultaneously. See Vinyl Pool Installation Process for the detailed fitting technique.
The Upgrade Opportunity
Liner replacement is the natural moment to make changes to the pool’s liner:
- Step up to 27–30 mil: the extra cost ($400–$800 over 20 mil) is the same at replacement as at original installation; the longer interval before the next replacement makes it worth considering
- Change the colour and pattern entirely: unlike concrete (which needs resurfacing to change finish) or fibreglass (which can’t change gelcoat colour), vinyl’s “look” can be completely refreshed at each replacement
- Coincide with coping replacement: since the pool area is already disrupted and the crew is present, combining coping replacement with liner work saves mobilization cost
Toronto-Specific Liner Lifespan Factors
- Ontario winters: proper winterization protects vinyl liners from freeze damage; liners in pools that weren’t properly winterized (water not lowered adequately, ice allowed to form against the liner surface) age faster
- Hard water: Toronto’s hard municipal water creates calcium deposits at the waterline that are abrasive against the liner surface over time; managing calcium hardness within target range reduces this wear
- Direct sun exposure: a pool positioned to receive full sun all day will age its liner faster than a partly shaded pool — UV is the primary liner degrader in outdoor pools
Frequently Asked Questions
How long does a liner replacement take?
Typically 1–3 days: draining on day one, inspection and any repairs, plus liner fabrication wait (1–3 weeks if not pre-ordered), then installation in 1 day and refill over 12–36 hours.
Can I install a new liner myself?
Not recommended — liner installation requires commercial vacuum equipment and technique to prevent wrinkling. An improperly fitted liner often fails within a season.
What’s the most common thing found during a liner inspection?
Surface rust on steel wall panels is the most frequently encountered condition in older Toronto pools. Light surface rust is normal and doesn’t affect the installation; significant corrosion needs to be addressed before the new liner goes in.
What mil thickness should I choose for my replacement liner?
If cost is the primary concern, 20 mil is standard. If you want to extend the interval before the next replacement, 27–30 mil adds $400–$800 and typically adds 3–5 years to liner lifespan.
Get a Liner Assessment
The only way to know whether your liner needs patching or replacing is to have it inspected on site.
Contact Easy Pools at (647) 449-9512 for a free, no-obligation liner assessment and replacement quote.