

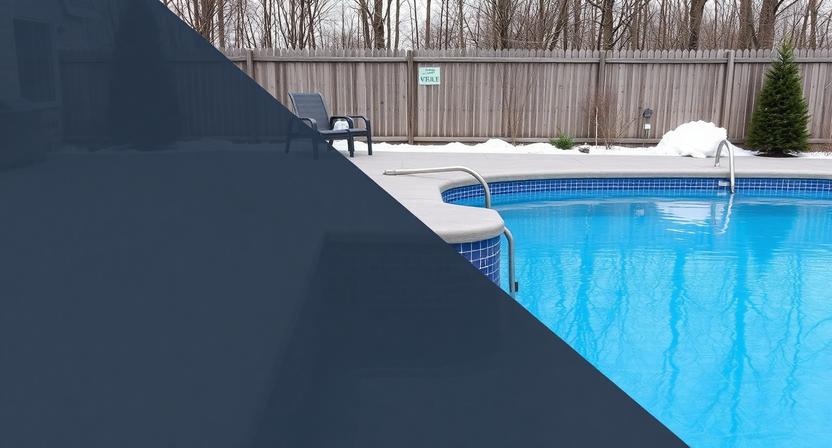
Toronto’s freeze-thaw winter is harder on pools than most Canadian cities further north, because the ground cycles repeatedly through freezing and thawing rather than freezing and staying frozen. Water left in pool plumbing goes through this cycle multiple times between October and March — which is why inadequate line blowing is the single most common cause of expensive spring damage. This guide covers the full closing sequence, the equipment winterization steps that matter most, and the mistakes that show up as cracked fittings and failed equipment in May.
When to Close in Toronto
The right closing trigger is water temperature, not calendar date: close when the pool water drops below 15°C and stays there. Below 15°C, algae growth is minimal and chemical maintenance becomes largely unnecessary — there’s no value in keeping the pool chemically active in cold water.
For most GTA pools, this means mid-September to mid-October. The risk of closing too late is a sudden hard frost before the lines are blown out. Toronto’s average first hard frost falls in late October, but frost can occur in September in a cold year — closing in early October provides a reliable buffer.
Don’t close too early: if water temperature is still above 20°C when you close, algae can establish under the cover during the first weeks. A warmer pool at closing needs a higher shock dose and more algaecide in the closing chemical treatment.
One to Two Weeks Before Closing: Chemistry Preparation
Getting chemistry right before closing is as important as the physical closing itself — the chemical balance you set going into winter will hold (or degrade) across a 6-month period.
- Shock the pool 1–2 weeks before the planned closing date — not immediately before. This gives the shock time to fully work before the cover goes on.
- Adjust pH to 7.2–7.4 (slightly lower than normal operating range — pH tends to rise over winter)
- Adjust total alkalinity to 80–100 ppm
- Adjust calcium hardness to target range for your pool type
- Add a winter algaecide — a slow-release formulation designed to remain active through the winter at low water temperatures
- For saltwater pools: check and adjust salt level, confirm the cell is still generating correctly before shutdown
The Closing Sequence
Step 1: Remove and Store Accessories
Remove pool ladders, handrails, diving boards, automatic cleaners, and any pool toys or accessories. Drain and dry them before storage. Ladders and handrails left in the pool over winter can damage the liner or create pressure points on fibreglass where ice forms.
Step 2: Lower Water Level
How far to lower water depends on your cover type and pool type:
- For mesh safety covers: lower water 30–45 cm (12–18 inches) below the coping — this prevents the ice sheet from contacting the coping underside and pushing the cover.
- For solid winter covers: lower 15–30 cm (6–12 inches) below the top of the skimmer opening.
- For vinyl liner pools: never drain below the bottom of the skimmer opening — the liner needs water weight to maintain its position against the walls. A liner drained too low can shrink, crack, or lose its shape.
Step 3: Blow Out the Plumbing Lines
This is the most critical step in the entire closing process. Water left in buried plumbing lines will freeze in Toronto’s winters, expand, and crack PVC pipe, split fittings, and destroy equipment. No other closing step matters as much as getting this right.
Using a commercial air compressor (minimum 1.5–2 CFM) or a shop vac set to exhaust:
- Blow out the main drain line — connect to the fitting and blow until only air is exhausting from the return jets
- Blow out each skimmer line individually — plug each line at the pool wall with a winterizing plug as air comes out to prevent water from re-entering
- Blow out each return jet line individually — insert an expansion plug in the return fitting immediately after blowing to seal the line
- Blow out the heater bypass line and any vacuum or auto-fill lines
The gizzmo: a hollow threaded plug inserted in the skimmer body to absorb ice expansion. This is not a substitute for properly blown-out skimmer lines — it’s a safety backup for residual water that couldn’t be fully cleared.
Step 4: Drain Equipment
After the lines are blown, drain the equipment components that hold standing water:
- Pump: remove both drain plugs (usually two — one on each side of the pump housing) to drain the volute completely
- Filter: open the tank’s drain or drain plug; for DE filters, remove the DE grids and clean before storage; for cartridge filters, remove and store the cartridge indoors
- Heater: the heat exchanger must be drained — typically through a drain plug on the heater’s lower section; a heater with a cracked heat exchanger from winter freeze is one of the most expensive spring repairs
- Salt chlorinator cell: rinse and store the salt cell indoors if possible; the cell is sensitive to freeze damage and should not remain in the plumbing over winter
- Multiport valve: remove the handle and store indoors; the valve body is particularly susceptible to cracking if residual water freezes inside
Store removed components in the pump basket, the skimmer basket, or a labelled bag indoors — you’ll need them at opening.
Step 5: Add Antifreeze to Skimmer Lines (Optional)
Pool antifreeze — propylene glycol only, not automotive ethylene glycol antifreeze — can be added to skimmer and suction lines as insurance against any water that couldn’t be fully blown out. Typically 1–2 litres per skimmer line is poured directly into the skimmer after blowing, then the gizzmo is installed.
This step is optional on pools where lines were thoroughly blown but provides peace of mind on skimmer configurations that are difficult to fully clear of water.
Step 6: Install the Winter Cover
Mesh safety covers: permanent anchors are drilled into the deck during initial installation; the cover is tensioned across the pool on a series of straps and springs. Mesh covers allow rain and snowmelt to drain through into the pool — no pumping required, but they allow some fine debris through.
Solid winter covers: held by water bags placed around the perimeter on top of the coping. Water collects on top of a solid cover over winter and must be pumped off periodically — a solid cover left with significant standing water can collapse, and the water can contaminate the pool below. A water pillow in the centre of the pool supports the cover’s centre section away from the ice. Solid covers are cheaper ($200–$600) but require more active management.
Automatic safety covers: operate year-round; simply close before the equipment shutdown. The most convenient option for winter and the most effective safety barrier. See Pool Safety Covers Toronto.
Common Winterization Mistakes That Show Up in Spring
- Inadequate line blowing: water remains in pipes, freezes, and cracks fittings. The most expensive and most preventable mistake.
- Forgetting the heater drain plug: a cracked heat exchanger from a winter freeze is a $500–$2,000 repair.
- Not removing the filter cartridge or DE grids: freezing inside the filter can crack the cartridge housing or damage the filter tank.
- Leaving the multiport valve handle in place: the valve body cracks with trapped water; the handle should be removed and stored.
- Using automotive antifreeze: propylene glycol (pool antifreeze) is non-toxic; ethylene glycol (automotive antifreeze) is toxic and must not enter pool water.
- Fully draining a vinyl liner pool: the liner requires water weight to maintain position; draining completely causes liner shrinkage and potential cracking.
- Not checking the cover during winter: a solid cover that accumulates significant standing water should be pumped; a cover with a tear may allow debris to enter the pool, requiring extra work at opening.
DIY vs. Professional Closing
A professional closing service in the GTA typically costs $200–$450 for a standard inground pool, and includes chemical balancing, equipment blowout, plug installation, and basic cover setup.
Where professional service reduces risk:
- Line blowing requires a commercial compressor and knowledge of the plumbing configuration — an underblown line can go undetected until spring reveals cracked fittings
- Heater and filter draining procedures are equipment-specific and easy to do incompletely
- Finding a freezing-temperature forecast in the long-range forecast the week of your closing appointment is difficult if you’re DIYing; professionals build schedule buffers
Many homeowners who maintain DIY through the season still hire for closing specifically because the consequences of a mistake are expensive and won’t be discovered until the following spring.
Frequently Asked Questions
When should I close my pool in Toronto?
When water temperature drops below 15°C — typically mid-September to mid-October in the GTA. Before the first sustained hard frost, which can occur as early as late September.
What’s the most important step in winterizing a pool?
Blowing out the plumbing lines. Water left in buried pipes freezes, expands, and cracks fittings — the most common and most expensive winter damage scenario.
Can I use automotive antifreeze in my pool lines?
No. Automotive antifreeze (ethylene glycol) is toxic. Pool antifreeze is propylene glycol — non-toxic and specifically formulated for pool plumbing.
How far should I lower the water at closing?
For solid covers: 15–30 cm below the skimmer opening. For mesh covers: 30–45 cm below the coping. For vinyl liner pools: no lower than the bottom of the skimmer — the liner needs water weight to maintain its position.
How much does professional pool closing cost in Toronto?
Typically $200–$450 for a standard inground pool, depending on pool size and complexity.
Professional Pool Closing Service in Toronto
Proper closing protects against thousands of dollars of potential spring repair.
Contact Easy Pools at (647) 449-9512 for fall closing service or a full seasonal maintenance package.